Mickey light post directions

Quote from MBMACS: I don't know how to build it for $50, it cost me $90 @ Home Depot.

I can give you a hint Mac. I priced the globe that already had the bulb and wire. It was $26. The 2 smaller bulbs were around $20. The post was $50 alone so what you do is stick the post under the cart and act like you forgot it. Just kidding. After DD and I priced it all out I started to think why not use black pvc pipe and use that as a post. I bet it's sure cheaper. If you have to have the little bar across the middle I'm sure you could get a piece of wood or something from a crafts store. Just a thought. I'm making one before we see u at the fort Macs.


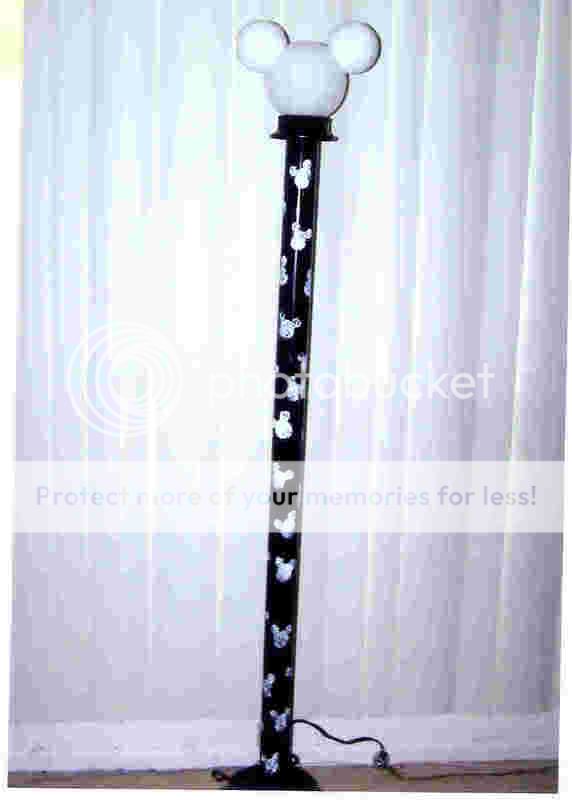
I got that big globe with the wire already to go, I was a tad bit lazy to do it from scratch. The pvc was the way to go for sure, I used the scrap as a filler while putting the concrete in the base. If you use the globe with the wire, get yourself 3 #10 machine screws and nuts to replace what comes with the globe, to secure it to the 2" female pvc adapter for the top. Also used another adapter to sit in the base.We just lit it up in the dark, man that thing is bright. Think we will switch to either a 40 watt bulb, or go all out and spend $2.97 on the 25 watt green bulb. I figured better to not meet store security and just go ahead and buy everything.......:rotfl:
 
So did I read this right? You bought the post in the section where the bulbs are or you used pvc? PVC should have been a few bucks. Did you put an elbow in the flower pot for the cord?
 
We just made ours today. Here are a couple pics.

lamppost3.jpg


lamppost2.jpg


Blessings,
Winnie and Fred
 
So did I read this right? You bought the post in the section where the bulbs are or you used pvc? PVC should have been a few bucks. Did you put an elbow in the flower pot for the cord?

I used 2" pvc, painted it. For the cord, I notched the rear of the post. During travel, the globes and cords will be seperate from post and base. I looked at buying a real post but even with the photo cell, I could not see spending $50+ just for a post.pirate:
 
You all have done such a great job with these lights. I plan on building one after our July 4th trip. I don't think I will have time to build one before we go. I'll use it when we go back in October and December.
 
Well I finally broke down this morning and did it. I got the 12" globe with the outlet already attached and bought the two 6" globes for ears. I spent $56 on those 3 things plus a 10' piece of pvc pipe and the black spray paint. I already had an extension cord and I'm going to use a xmas tree stand for the base because the one I have is plastic and it's cracked so it doesn't hold water anyway. I knew I didn't throw it away for some reason lol.

I haven't attached the ears because I forgot the silicone. I measured out my ears 5" from the center and used a hole saw with a drill bit to do my holes. IMHO I think that's the best method to cut the holes. The only drawback is it got hot and left like a ridge around the hole. Luckily I have a air powered drummel tool and it grounded the edges off smooth. The pole looks good and has a nice texture to it. I noticed the paint chipped a couple of places so I will have to touch up ocassionally. I was wondering if anybody ever used that purple primer first and then painted it. I think I may try it on some scrap and see if it flakes afterwards.

Now we just need a banner like Macs or a wooden sign with our name.

Stack,
I'll get my plumber to test out the primer on the pvc tomorrow at work. I am bringing the extra paint to touch up when we arrive.I used a drimmel also, made it easy to cut out the holes. Like the x-mas tree stand idea. Also picked up the green bulb for it.
:yay:
 
i guess you could say our family is cheating. we bought the small globes at menards..

the large globe is a lamp post top (also at menards). it has all the electrical stuff for the lamp. so, just put in your ears and buy a lamp post and you are set..

we didn't buy the lamp post. we bought pvc and are able to slip the whole lamp w/post onto another in the yard or slide it off and take it with us camping...:flower3:
 
My DH has been working on one of these for us.... the only difference I'm seeing is that he used a hot melt glue gun to attach the ears to the head. Dried fast and clear, and is still a bit pliable to handle the road movement. Now, to decide where to store him....lol....
 
i'll need to find this again in thehopefully near future .. I think ineed a few of these for theses for myself and the rest of my disney crazy family lol .. :love:
 
Hi out there... My family and I just returned home today from the Fort and we want to know if there is any place we can buy one of the mickey globe lamp posts? We saw quite a few of them at the fort this weekend and now we have to have one or two. Please let me know!
 
Hi out there... My family and I just returned home today from the Fort and we want to know if there is any place we can buy one of the mickey globe lamp posts? We saw quite a few of them at the fort this weekend and now we have to have one or two. Please let me know!

The globe ones can't be bought and are home-made. Instructions on how to make one are in this thread.
 
After drooling over the lights in this thread I have finally tried my hand at making them. I made 2 Mickey's and a Minnie. My DM will get one of the Mickey Lamp posts for Christmas as we saw so many at FW in August and she loved them as much as me. The other Mickey and the Minnie will travel with us in our camper, but also look terrific on our new Deck.

Here are is a daytime photo.

Nicks12thBirthday048.jpg


I'll try to take a night time photo tonight and post it for you.

Thanks for all the inspiration. I am so happy.
 
Those are great! What did you make Minnie's bow out of? And how did you do it?

If I ever make one, I'd have to have Minnie because she's my favorite! (Shhh, don't tell Mickey! :rolleyes1 LOL)
 
Those are great! What did you make Minnie's bow out of? And how did you do it?

If I ever make one, I'd have to have Minnie because she's my favorite! (Shhh, don't tell Mickey! :rolleyes1 LOL)

Minnie was much more complicated. First I made the Mickey Head. Then I decided that I needed a 5 foot length of red rope lights. Did you know that you can't buy 5 foot lengths of rope lights, at least they aren't available around here and I didn't want to pay shipping costs. After researching rope lights I determined that most run in 18" circuits which meant that I could cut them as long as my length was divisible by 18" so six feet it was. I dug out my red Christmas rope lights and bit the bullet and cut them. They worked :thumbsup2 
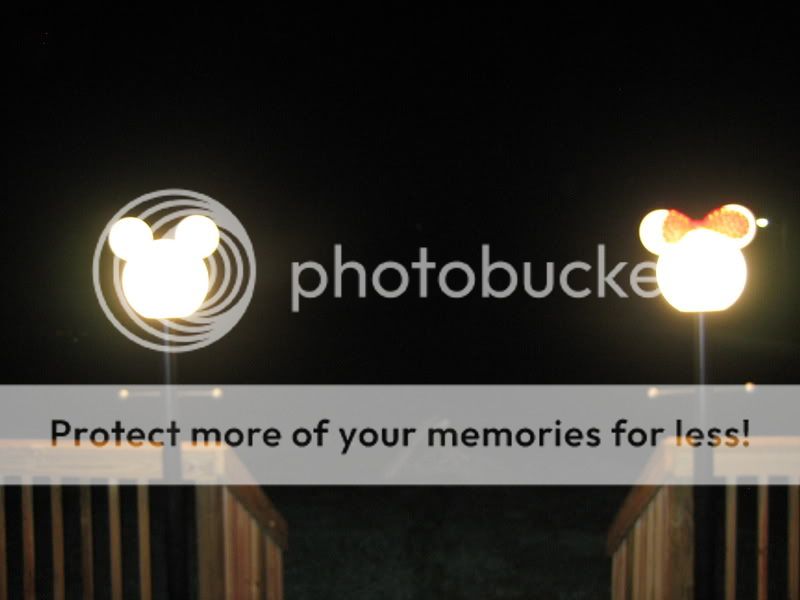
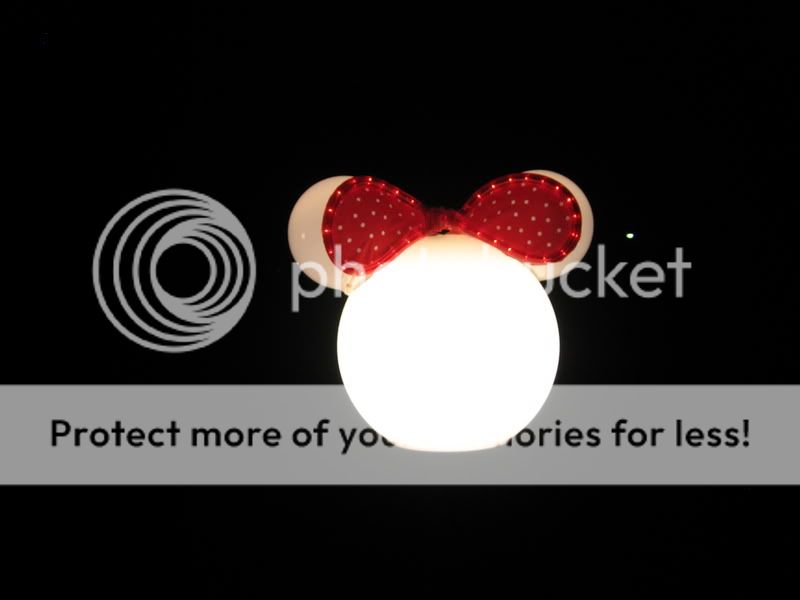
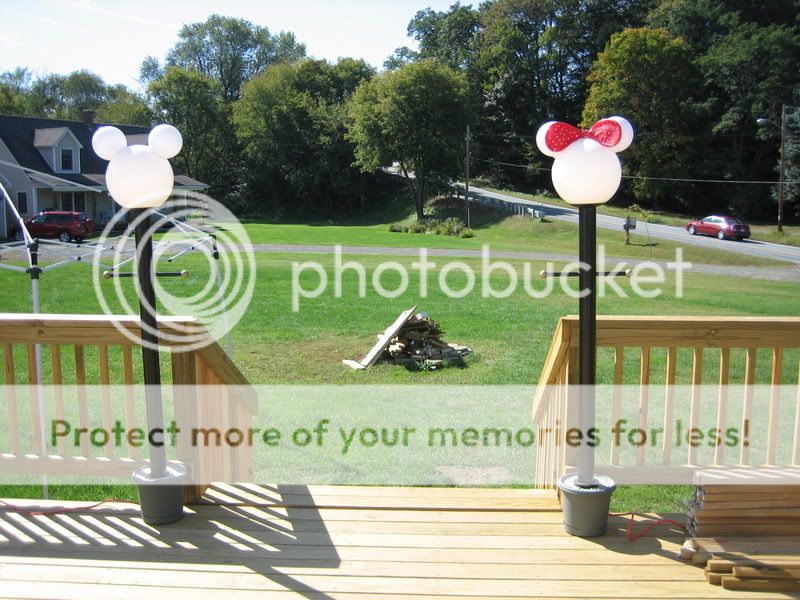
Next I formed back to back figure 8's using the rope light. The 2 ends were then put inside the Mickey head through 2 holes drilled in the top. Since the rope lights didn't want to lay correctly I used wire ties to hold them around the ears. I used silicone to waterproof the holes. I ran the cord through the inside of the globe. I split the cord into 2 sections. I hot glued the wires to the sides of the globe making them symmetrical as I knew they would be visible through the globe. Next I drilled 2 holes into the light fixture to allow the wires to run through to the other wires. All wires were then connected so that one plug turns on both the Mickey head and the bow. I did have to notch the top of the pole to make room for the wires. The last step was to use red electrical tape to hold the entire center of the bows. There is actually a bow on each side of the ears, having the center in common. Then I hot glued the polka dot fabric to the back of the rope lights. A bit time consuming, but well worth it I think. Let me know if you have more questions.

Deb
 

GET A DISNEY VACATION QUOTE

Dreams Unlimited Travel is committed to providing you with the very best vacation planning experience possible. Our Vacation Planners are experts and will share their honest advice to help you have a magical vacation.

Let us help you with your next Disney Vacation!


facebook twitter
Top