Photo Tutorial: Back to Basics/Improving Our Photos

Catching up!

Repeating Patterns.
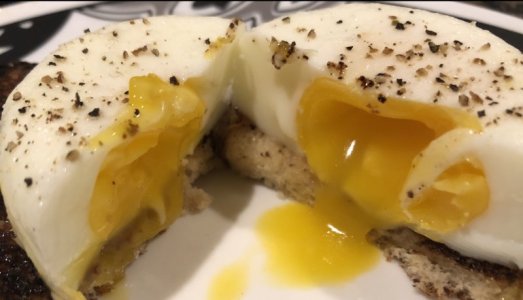
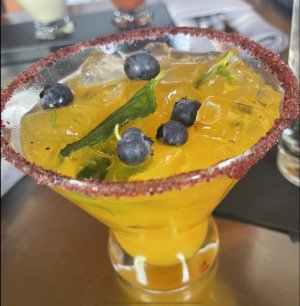
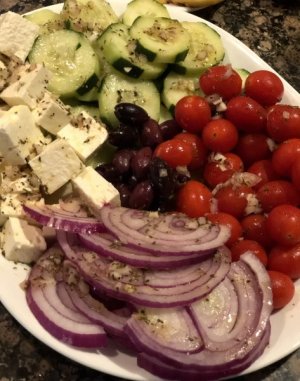
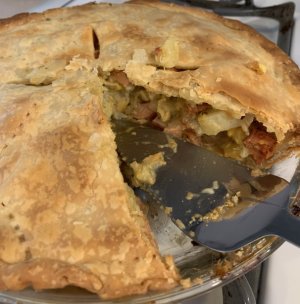
I like to use this form of composition when it comes to food. This is from four or five years ago; so the post processing is very minimal.
170310 Shanghai-59.jpg


I also try and use if if I'm doing close-ups in nature; particularly with flora.


170415 Fungi-49.jpg


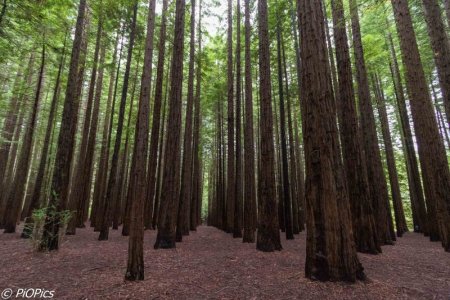
Nature has a way of providing you with opportunities to layer your shot with leading lines and repeating patterns!


210105 Lotus-45.jpg


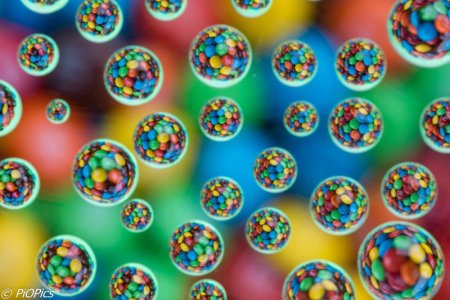
Of course, if you were locked down during Covid and had heaps of time to play, repeating patterns is an easy one to set up if you have small objects, a pane of glass and water drops.


200426 WaterBeads-8.jpg


princess::upsidedown
 
Texture

Mark showed a shot using an Neutral Density filter and how the water was milky and soft.

Expanding on that concept.


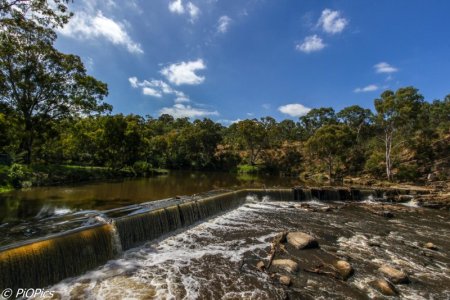
This was the shot taken without the ND filter.

0112 Dights Falls.jpg


The ND filter works like putting a pair of sunglasses on your lens. It blocks out light.
To compensate for the less light hitting the sensor, you can either increase the ISO, open up your aperture or increase the time you leave the lens open for.
Depending on your subject, one or all of these may be the preferred option.

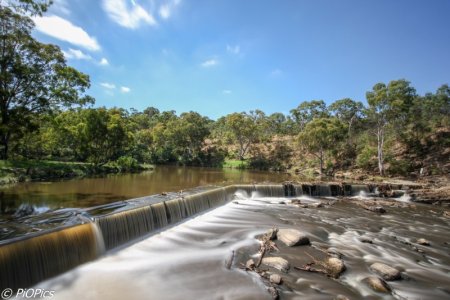
In the case where there is fast flowing water, increasing the time you leave the lens open for will result in the milky/misty effect for where the water flows fast, with the ND filter on. I just look for where there is white choppy water to determine if the image will result in the milky effect.

If you leave the lens open for longer, you will need a tripod.

0112 Dights Falls-15.jpg


Personally, I prefer seeing milky white texture in water shots.


Regarding ND filters.

https://www.bhphotovideo.com/explora/photography/hands-on-review/a-guide-to-neutral-density-filters


Effectively, the higher the "number" on the ND filter, the darker the glass. You just need to decide what you want to use it for and which one suits your needs.

There are also reams of information about which is the 'best' ND filter to get. FWIW, I have owned B&W (I broke it!!!), Hoya (I found it had a green cast to it) and have bought a Zomei 10-stop ND filter. At the time I was looking, the 10-stop Zomei had reviewed against the name brands and the colour cast or lack of it came out near the top. It also came at a fantastic low price point.

NOTE: AT the time I was buying the Zomei, I'm not sure that Gobe was around. By all accounts, the Gobe ND might be better.

https://gimbalgarage.com/zomei-nd-filter-review/
 
Great participation for texture with some really nice photos! Please keep posting pictures demonstrating texture if you come across them and label what they are.

That goes for any of the principles we’ve touched on, or others. There really are so many! This is just for fun and leaning so there are no firm rules about any of it. It’s all about learning what our options are as photographers.

If you haven’t posted here yet but are following along, let’s see some of your photos! Don’t be shy!
 
Today I thought we’d look at Filling the Frame. Another one I really like. Don’t be afraid to get as close as you can to your subject in order to make a big impact. There are many ways to do this including - wait for it - zooming with your feet (as has been mentioned!) 😝 , using a telephoto lens or extension tubes as Mark used, and in some cases, cropping, for effect and to eliminate some clutter.

https://shotkit.com/fill-the-frame-photography/

There are times you have to do what you can to “get the shot” and you might have to edit later. This can happen in the car, at a show, with animals and kids, or on a ride, etc. But certainly if you do have a few extra seconds to set up your shot, take advantage of that time to zero in and fill the frame. Try shooting the same thing from different angles if you want to. That helps us learn what works best.

The more you shoot, the more instinctive it becomes.

Please feel free to add your own thoughts to mine.

1680854845223.jpeg

1680854914919.jpeg

1680854956054.jpeg

1680855078661.jpeg

1680855029106.jpeg

1680855141340.png

1, 2, 5 and 6 shot with smartphone and minimal to no editing.

#s 3 and 4 shot w DSLR also with minimal to no editing.

You can do this!

Let’s see your pictures that fill the frame!
 
One piece of photography advice I see all the time is to get it right in the camera so that you minimize your post production work. While I think this is generally good advice, I think there are a lot of cases where you should do the exact opposite - shoot with the intent to make changes in post production! Filling the frame is a good example. I always try to remind myself to shoot a little (not too much) wider than I want for my final shot. It is easy to crop in post production but it is very difficult to zoom out after you've taken a picture.

Even if you're confident that you've nailed to perfect crop in camera, you may want to print or post a different aspect ratio. If you make prints, a 4x6, a 5x7, an 8x10, and a 11x17 print are all different shapes. They are all rectangles, but some are much wider than others. What my have been a perfectly shot portrait of someone from their feet to the top of their hat in a 4x6 aspect ratio will require you to cut off some of the top or bottom of the picture if you want to make an 8x10. If you just scaled up the 4x6, it would be an 8x12, so you'll be cutting off some of the long side of the picture. If you purposely shot a little wider, you can crop the original different ways for different aspect ratios.

All that said, I definitely agree that you want to "fill the frame" on your final images. But that doesn't just mean zooming in to get your entire subject. It also means appropriately using the space in your picture. A common mistake I see is to have your subject people stand under or next to a sign or something your want to shoot. In many cases, it is better to have them approach the camera until they fill the space better.

Here's an example. If the bellhop was your subject person and you wanted to show them with the entrance, you've got a bunch of dead space between the top of their head and the sign. There is too much of the picture that is neither the entrance gate nor the subject.
i-8bNtcFb-L.jpg

Canon 1DM2, 24mm, 1/100s, f/5.0, ISO 200

Instead, have the subject move forward toward the camera. (Yes, I know I faked it in Photoshop. I'm just trying to illustrate a point and I couldn't think of good examples I had shot both ways.) Now they person takes up a much larger part of the image. It's a 2 dimensional image, so viewers won't notice or care that he is no longer directly under the entrance gate.
i-4s9GxVV-L.jpg


Yes, fill the frame. But not just the edges of the frame. Look at your image and think about whether you have a significant amount of useless space in the image that doesn't tell the story you are trying to tell. If you do, consider moving yourself or part of your subject so that you can reduce the wasted space.
 
Fill the Frame

Here's my take on fill the frame.
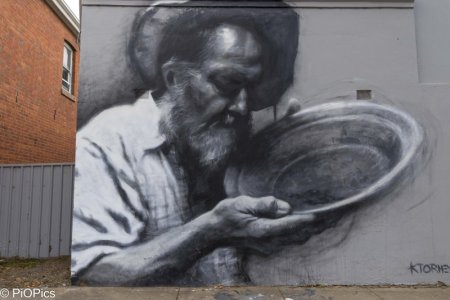
This is the full image of a street art.


MungoDay1-35.jpg


It is worth spending a bit of time just looking at your subject and thinking about how else you can take the image.
In my case, I walked across the street; up and down the street, and also close up to the image.

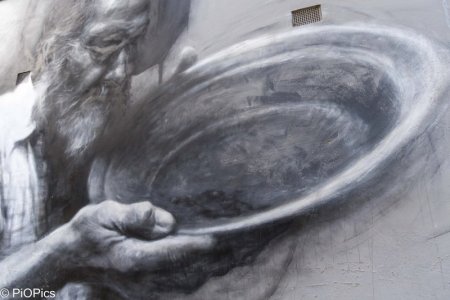
Here's how I decided to fill the frame and compose my image of the same subject.

MungoDay1-34.jpg


The artist of this town has filled it with images of local people; and also of his subjects doing things that are part and parcel of this town's life. In this case, it's about gold mining. I just decided to take the image from an angle that would enhance the pan and 'fill the frame'.
 
One piece of photography advice I see all the time is to get it right in the camera so that you minimize your post production work. While I think this is generally good advice, I think there are a lot of cases where you should do the exact opposite - shoot with the intent to make changes in post production! Filling the frame is a good example. I always try to remind myself to shoot a little (not too much) wider than I want for my final shot. It is easy to crop in post production but it is very difficult to zoom out after you've taken a picture.

Even if you're confident that you've nailed to perfect crop in camera, you may want to print or post a different aspect ratio. If you make prints, a 4x6, a 5x7, an 8x10, and a 11x17 print are all different shapes. They are all rectangles, but some are much wider than others. What my have been a perfectly shot portrait of someone from their feet to the top of their hat in a 4x6 aspect ratio will require you to cut off some of the top or bottom of the picture if you want to make an 8x10. If you just scaled up the 4x6, it would be an 8x12, so you'll be cutting off some of the long side of the picture. If you purposely shot a little wider, you can crop the original different ways for different aspect ratios.

All that said, I definitely agree that you want to "fill the frame" on your final images. But that doesn't just mean zooming in to get your entire subject. It also means appropriately using the space in your picture. A common mistake I see is to have your subject people stand under or next to a sign or something your want to shoot. In many cases, it is better to have them approach the camera until they fill the space better.

Here's an example. If the bellhop was your subject person and you wanted to show them with the entrance, you've got a bunch of dead space between the top of their head and the sign. There is too much of the picture that is neither the entrance gate nor the subject.
i-8bNtcFb-L.jpg

Canon 1DM2, 24mm, 1/100s, f/5.0, ISO 200

Instead, have the subject move forward toward the camera. (Yes, I know I faked it in Photoshop. I'm just trying to illustrate a point and I couldn't think of good examples I had shot both ways.) Now they person takes up a much larger part of the image. It's a 2 dimensional image, so viewers won't notice or care that he is no longer directly under the entrance gate.
i-4s9GxVV-L.jpg


Yes, fill the frame. But not just the edges of the frame. Look at your image and think about whether you have a significant amount of useless space in the image that doesn't tell the story you are trying to tell. If you do, consider moving yourself or part of your subject so that you can reduce the wasted space.
Excellent thoughts and good advice. I am always learning, too.

That’s what’s so nice about this board. 👍🏻
 
Fill the Frame

Here's my take on fill the frame.
This is the full image of a street art.


View attachment 751852


It is worth spending a bit of time just looking at your subject and thinking about how else you can take the image.
In my case, I walked across the street; up and down the street, and also close up to the image.

Here's how I decided to fill the frame and compose my image of the same subject.

View attachment 751853


The artist of this town has filled it with images of local people; and also of his subjects doing things that are part and parcel of this town's life. In this case, it's about gold mining. I just decided to take the image from an angle that would enhance the pan and 'fill the frame'.
These are nice, @PrincessInOz! I like seeing a bit of the building to understand what the image is and where it came from. I might not have realized it was street art without it.

Good point about moving around and getting your shot from different perspectives.

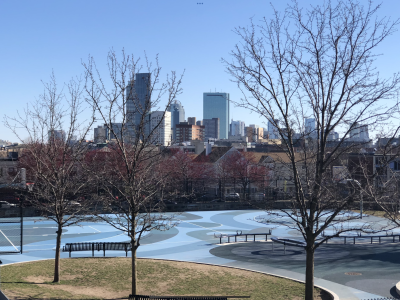
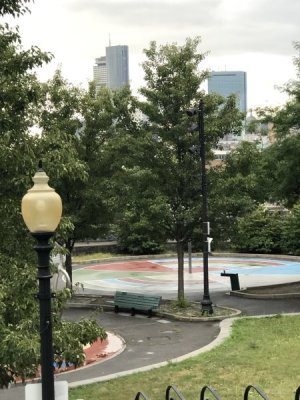
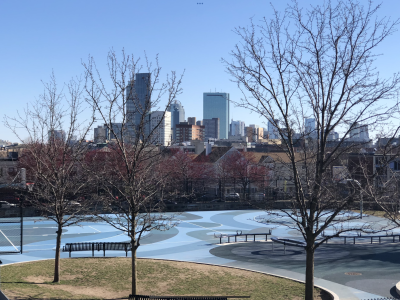
Yesterday I was going by the church that I posted pictures of earlier in this thread. It was a nice day and not freezing cold (for the first time in a while) so I decided to see what kind of shots I could get this time. I only had my cell phone with me. (Best shots come from the camera you have, right!)

1681033433869.jpeg

This was nice because I was able to capture the view of the city I was going for before since the trees were bare this time.

Not only is this an iconic church, the views of the City of Boston from there are phenomenal.

1681033074368.png

So it is good to get different views - sometimes even at different times - of the things you’re trying to shoot.

Btw, Princess, I meant to say I really liked the Stonehenge picture that had the people standing at the side. It really helped put the enormity of the structures in perspective. 👍🏻 Nice work!
 
By coincidence, I was giving photography advice to my son and his girlfriend yesterday for the Switzerland trip they have planned to celebrate her graduation. A lot of that discussion was about perspective. Here are some of the key points I made.

Photographers sometimes use the phrase "zooming with your feet." I don't like the phrase because it confuses two very different things. Zooming is similar to cropping. Nothing about the picture changes accept the field of view. If you "zoom with your feet", you move towards or away from your subjects that their relative positions and apparent sizes change.

If you to take a picture of a person while showing them in the context of their surrounds, use a wide lens and get close to your subject. Here is an example that shows my son while also showing that he's at Lover's Point Beach in Pacific Grove, CA. Even if you don't know the area, you can clearly see that he's on a beach surrounded by hills and low cliffs as opposed to something like a Florida beach. I took this picture with a really wide lens, camera held low, and then running along with him shooting blind.
20080314-NB0H4099-L.jpg

Canon 1D Mark II, 17mm, f/8, 1/1000s, ISO 200

Here is another picture taken on the same outing, but with a telephoto lens. Notice that you see very little about the environment he is in.
20080314-NB0H4289-L.jpg

Canon 1D Mark II, 115mm, f/5, 1/1600s, ISO 200

Incidentally, people often talk about wide angle lenses distorting faces. They don't. What gives that faces a distorted look is getting the camera extremely close to the subject.

Another thing that is different between shooting close and wide or far and zoomed is how compressed things look in the picture. Looking back at the top picture, the bay looks much bigger than it did in person. The wide angle view makes distant subjects look much further and smaller than they do in reality. The opposite is true when using a long focal length.

This is an example of a wildflower photo I took of my boys. Many years during the spring, my wife and I would find a good strip of wildflowers along the road and invite a bunch of friends to join us for a photo shoot. I stood so far back that I had to communicate with my wife by walkie-talkie during the shoot. By standing way back (and on a step stool), it gave the impression that there tons of flowers all tightly packed together and by cropping the picture carefully to avoid showing the areas past the wildflowers, it gave the impression of an endless field of flowers. The reality was that there was a road 5 feet to the left of the picture and a line of trees and a walking path 5 feet to the right and the flowers weren't really all that densely packed.
_D3_2246-Edit-3-L.jpg

Canon 5D Mark III, 300mm, 1/200s, f/5.6, ISO 100.

The lesson is that if you want things to feel closer together, back away from your subject and zoom in. If you want a greater sense of space, walk closer and zoom out.

You can also use perspective to manipulate how your viewer sees your subject. When you shoot down on people, they look smaller. When you get low and shoot up at them, they look larger. That's why I feel it is very important to try and get down to a child's level when you are taking pictures of them. Here are two extreme examples of my son.

In this picture, I'm standing over him looking down. It emphasizes his diminutive stature. It's not a particularly good picture, but it really communicates that you're looking at a child.
20080318-NB0H5988-L.jpg

Canon 1D Mark II, 17mm, f/11, 1/250s, ISO 100

This picture, taken moments later, makes him look like a giant, towering over the viewer.
20080318-NB0H5992-L.jpg

Canon 1D Mark II, 17mm, f/9, 1/250s, ISO 100
 
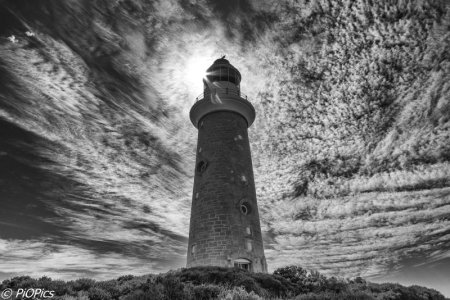
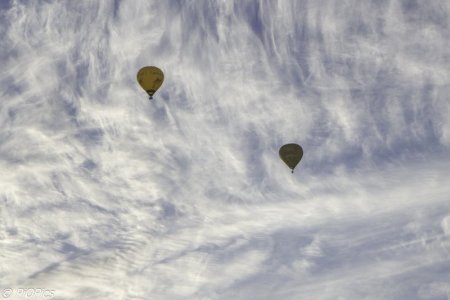
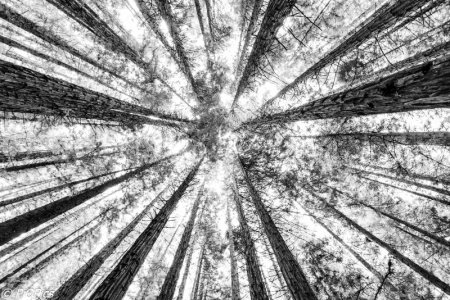
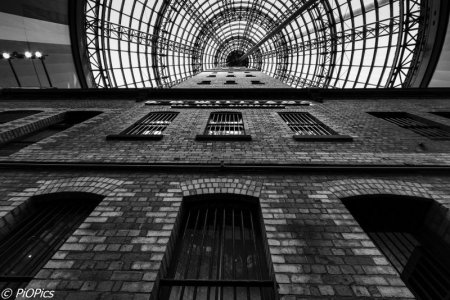
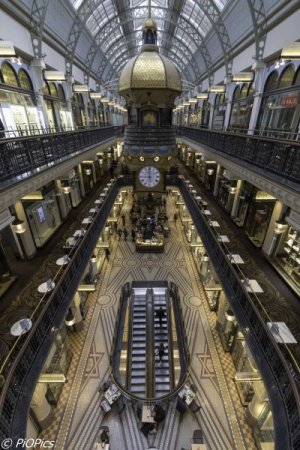
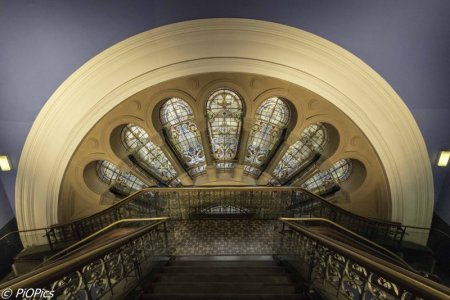
Perspective - Looking Up


210105 Lotus-23-2.jpg


0729 Open House-110-Edit.jpg


I like having fun with looking up; in the right context. I think it distorts your perception of up, down and sideways.
 
Last edited:

GET A DISNEY VACATION QUOTE

Dreams Unlimited Travel is committed to providing you with the very best vacation planning experience possible. Our Vacation Planners are experts and will share their honest advice to help you have a magical vacation.

Let us help you with your next Disney Vacation!


facebook twitter
Top